Building a Basic Kafka Application with Python

Kafka is a distributed streaming platform that is used for building real-time data pipelines and streaming apps. It is a powerful tool that can handle high volumes of data and allows for the storage and processing of streams in a fault-tolerant and scalable manner. In this article, we will go through the steps of setting up Kafka via Docker and Docker Compose, and then use the python Confluent Kafka library to build an example producer and consumer.
Install Docker and Docker Compose
To get started, you will need to have Docker and Docker Compose installed on your machine. If you don't have them installed, you can download them from the Docker website. Once you have them installed, you can proceed to the next step.
Create a Docker Compose file
Create a new directory on your machine, and within that directory, create a new file called "docker-compose.yml". This file will be used to define the services that make up our Kafka cluster.
Define the Kafka Service
In the "docker-compose.yml" file, add the following code to define the Kafka service:
version: '3'
services:
  kafka:
    image: confluentinc/cp-kafka:7.3.0
    environment:
      KAFKA_ADVERTISED_LISTENERS: PLAINTEXT://kafka:29092,CONNECTIONS_FROM_HOST://localhost:9092
      KAFKA_LISTENER_SECURITY_PROTOCOL_MAP: PLAINTEXT:PLAINTEXT,CONNECTIONS_FROM_HOST:PLAINTEXT
      KAFKA_ZOOKEEPER_CONNECT: zookeeper:2181
      KAFKA_OFFSETS_TOPIC_REPLICATION_FACTOR: 1
      KAFKA_GROUP_INITIAL_REBALANCE_DELAY_MS: 0
      KAFKA_TRANSACTION_STATE_LOG_MIN_ISR: 1
      KAFKA_TRANSACTION_STATE_LOG_REPLICATION_FACTOR: 1
      KAFKA_LOG_FLUSH_INTERVAL_MESSAGES: 1
    ports:
      - 9092:9092
This code defines a single service called "kafka" that uses the Confluent Kafka image version 5.5.1. It also sets the environment variables that are used to configure the Kafka service.
Define the Zookeeper Service
Add the following code to the "docker-compose.yml" file to define the Zookeeper service:
  zookeeper:
    image: confluentinc/cp-zookeeper:7.3.0
    environment:
      ZOOKEEPER_CLIENT_PORT: 2181
    ports:
      - 2181:2181
This code defines a single service called "zookeeper" that uses the Confluent Zookeeper image version 5.5.1. It also sets the environment variable "ZOOKEEPER_CLIENT_PORT" which is used to configure the Zookeeper service.
Start the Services
Now that we have defined our services, we can start them by running the following command in the same directory as the "docker-compose.yml" file:
docker-compose up
This command will start the Kafka and zookeeper services defined in the "docker-compose.yml" file.
Install the Confluent Kafka library
Make sure to install librdkafka which is used by the confluent kafka python package.
To do so in macOS: brew install librdkafka
To interact with the Kafka cluster, we will use the python Confluent Kafka library. To install it, run the following poetry command (you can use pip too):
poetry add confluent-kafka
Creating topics with the python client
create_topic.py
import sys
from confluent_kafka.admin import AdminClient, NewTopic

def create_topic(topic_name):
    conf = {'bootstrap.servers': 'localhost:9092'}
    admin_client = AdminClient(conf)
    new_topic = admin_client.create_topics([NewTopic(topic_name, num_partitions=1, replication_factor=1)])
    for topic, future in new_topic.items():
        try:
            future.result()
            print("Topic {} created successfully".format(topic))
        except Exception as e:
            print("Failed to create topic {}: {}".format(topic, e))

if __name__ == '__main__':
    if len(sys.argv) != 2:
        print("Usage: python {} <topic_name>".format(sys.argv[0]))
        sys.exit(1)
    topic_name = sys.argv[1]
    create_topic(topic_name)
This script uses the AdminClient class from the Confluent Kafka package to create a new topic. It takes a topic name as input, creates a new topic with that name, 1 partition and replication factor 1. If the topic is created successfully, it will print "Topic topic_name"
Create a producer
Create a new python file and import the confluent_kafka library, then create a function that will be responsible for producing messages to the Kafka topic.
`produce_messages.py`
import sys
from confluent_kafka import Producer

def produce_message(topic_name):
    conf = {'bootstrap.servers': 'localhost:9092'}
    producer = Producer(conf)

    def delivery_callback(err, msg):
        if err:
            print('Message delivery failed: {}'.format(err))
        else:
            print('Message delivered to {} [{}]'.format(msg.topic(), msg.partition()))

    for i in range(10):
        message = 'This is message number {}'.format(i)
        producer.produce(topic_name, value=message.encode('utf-8'), callback=delivery_callback)
        producer.poll(0)
        # flush is only needed if you want to synchronously ensure the message was received, but the producer is async
        #producer.flush()

if __name__ == '__main__':
    if len(sys.argv) != 2:
        print("Usage: python {} <topic_name>".format(sys.argv[0]))
        sys.exit(1)
    topic_name = sys.argv[1]
    produce_message(topic_name)
This function takes a topic name as an input and creates a producer object with the bootstrap servers configuration set to "localhost:29092" (which is the default port for Kafka on a single node setup). It then creates a for loop to produce 10 messages to the topic with a simple string value.
Create a consumer
consume_messages.py
import sys
from confluent_kafka import Consumer, KafkaError

def consume_message(topic_name):
    conf = {'bootstrap.servers': 'localhost:9092',
            'group.id': 'mygroup',
            'auto.offset.reset': 'earliest',
            }
    consumer = Consumer(conf)
    consumer.subscribe([topic_name])
    try:
        while True:
            msg = consumer.poll(1.0)
            if msg is None:
                continue
            if msg.error():
                if msg.error().code() == KafkaError._PARTITION_EOF:
                    print('Reached end of topic {} [{}] at offset {}'.format(msg.topic(), msg.partition(), msg.offset()))
                else:
                    print('Error occured: {}'.format(msg.error()))
            else:
                print('Received message: {}'.format(msg.value()))
    except KeyboardInterrupt:
        print("Exiting...")
    finally:
        consumer.close()

if __name__ == '__main__':
    if len(sys.argv) != 2:
        print("Usage: python {} <topic_name>".format(sys.argv[0]))
        sys.exit(1)
    topic_name = sys.argv[1]
    consume_message(topic_name)
This script uses the Consumer class from the Confluent Kafka package to consume messages from a Kafka topic. It takes a topic name as input, creates a consumer for that topic, and enters a while loop to poll for new messages. If a message is received, it is printed to the console.
This script will only display the messages, you can add some logic to handle them like storing them in a database for example.
Also, you can run this script after running the previous script of producing messages to see the messages being consumed.
Run the examples
Now that we have created our producer and consumer functions, you can run them and see the messages being produced and consumed.
Create the test topic:
poetry run python create_topic.py testtopic
Run the consume message script
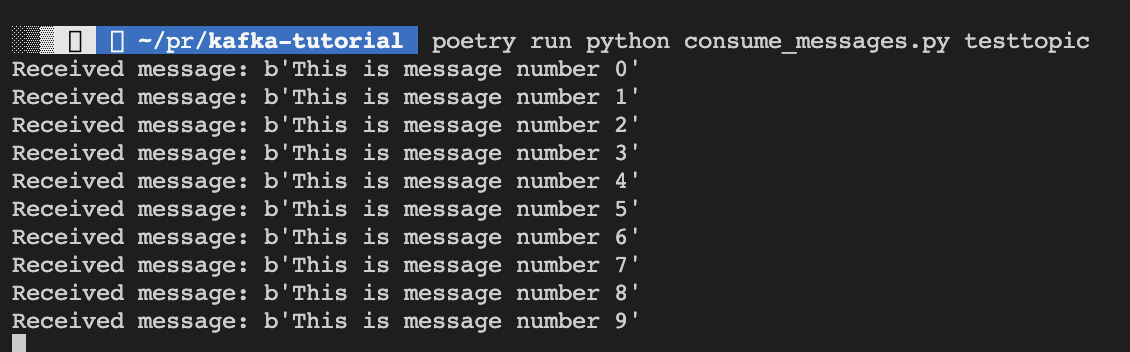
poetry run python consume_messages.py testtopic
Keep it running and produce some message using:
poetry run python produce_messages.py testtopic
You should see the message output in the consumer command:
Conclusion
In conclusion, setting up Kafka via Docker and Docker Compose is a straightforward process. By using the Confluent Kafka library, it is also easy to interact with the Kafka cluster and build useful producers and consumers. With this setup, you can quickly spin up a Kafka cluster for testing and development purposes and easily add more nodes to the cluster when needed.
Full source code on GitHub.


